Experiencing the issue of foggy headlights on your car? Not only do they decrease your vehicle’s aesthetic appeal, but they’re also a significant safety concern. Dimmed headlight visibility, particularly during nighttime or foggy conditions, can increase your risk of collisions or driving mishaps. Strict headlight laws in places like California further underscore the importance of maintaining bright, clear headlights.
In this comprehensive guide, we delve into the ins and outs of DIY headlight restoration. From cleaning foggy headlights to polishing and maintaining them for optimal performance, we’ve got you covered.
Read: California Headlight Law: Everything You Need to Know
What Is Headlight Restoration?

Headlight restoration involves removing the surface layer of your car’s headlights and adding a sealant to enhance their light output. As Chapel Hill Tire defines it, headlight restoration involves “[eliminating] the damaged components of your headlights while preserving the rest.”
While AAA mentions that headlight restoration provides less light output improvement than replacing parts, it is significantly more affordable and can return light output to about 70% of new lights.
Cleaning vs. Restoring Headlights
While cleaning your headlights can help reduce their fogginess, it’s not as comprehensive as restoring them. Cleaning removes the dirt from the headlight’s surface, whereas restoring involves abrasion to remove the headlights’ surface layer. We’ll detail the cleaning process in Step 2 of the section below titled “How to Restore Your Headlights.”
Traffic school can help you keep a clean driving record, prevent insurance increases, and more!
Why is Headlight Restoration Important?
Headlight restoration is crucial for several reasons:
- Improved Safety: Cloudy, discolored, or scratched headlights can significantly reduce your visibility during night or foggy conditions, creating a potential safety hazard. Restoring your headlights can improve the brightness and range of your car’s lights, ensuring safer driving.
- Increased Vehicle Value: The appearance of your vehicle plays a significant role in its value. Foggy headlights can make your car look old and poorly maintained, which may lower its resale value. By restoring your headlights, you can enhance the overall aesthetics of your vehicle and potentially increase its market value.
- Cost Savings: Replacing headlights can be an expensive affair, especially for high-end vehicles. Restoration is a more cost-effective option, extending the life of your existing headlights.
- Eco-Friendly: By restoring instead of replacing your headlights, you are contributing to reducing the waste in landfills, thus promoting environmental sustainability.
- Legal Requirements: In some regions, having dim or foggy headlights may not meet the legal standards for road safety and could result in fines or penalties. Headlight restoration can help you avoid such legal issues.
Remember, the effectiveness of your car’s headlights is a matter of safety, not just aesthetics. By maintaining them properly, you can ensure a safer, smoother driving experience.
What Causes Foggy Headlights?
Several elements contribute to the phenomenon of foggy, cloudy, or yellow headlights, including:
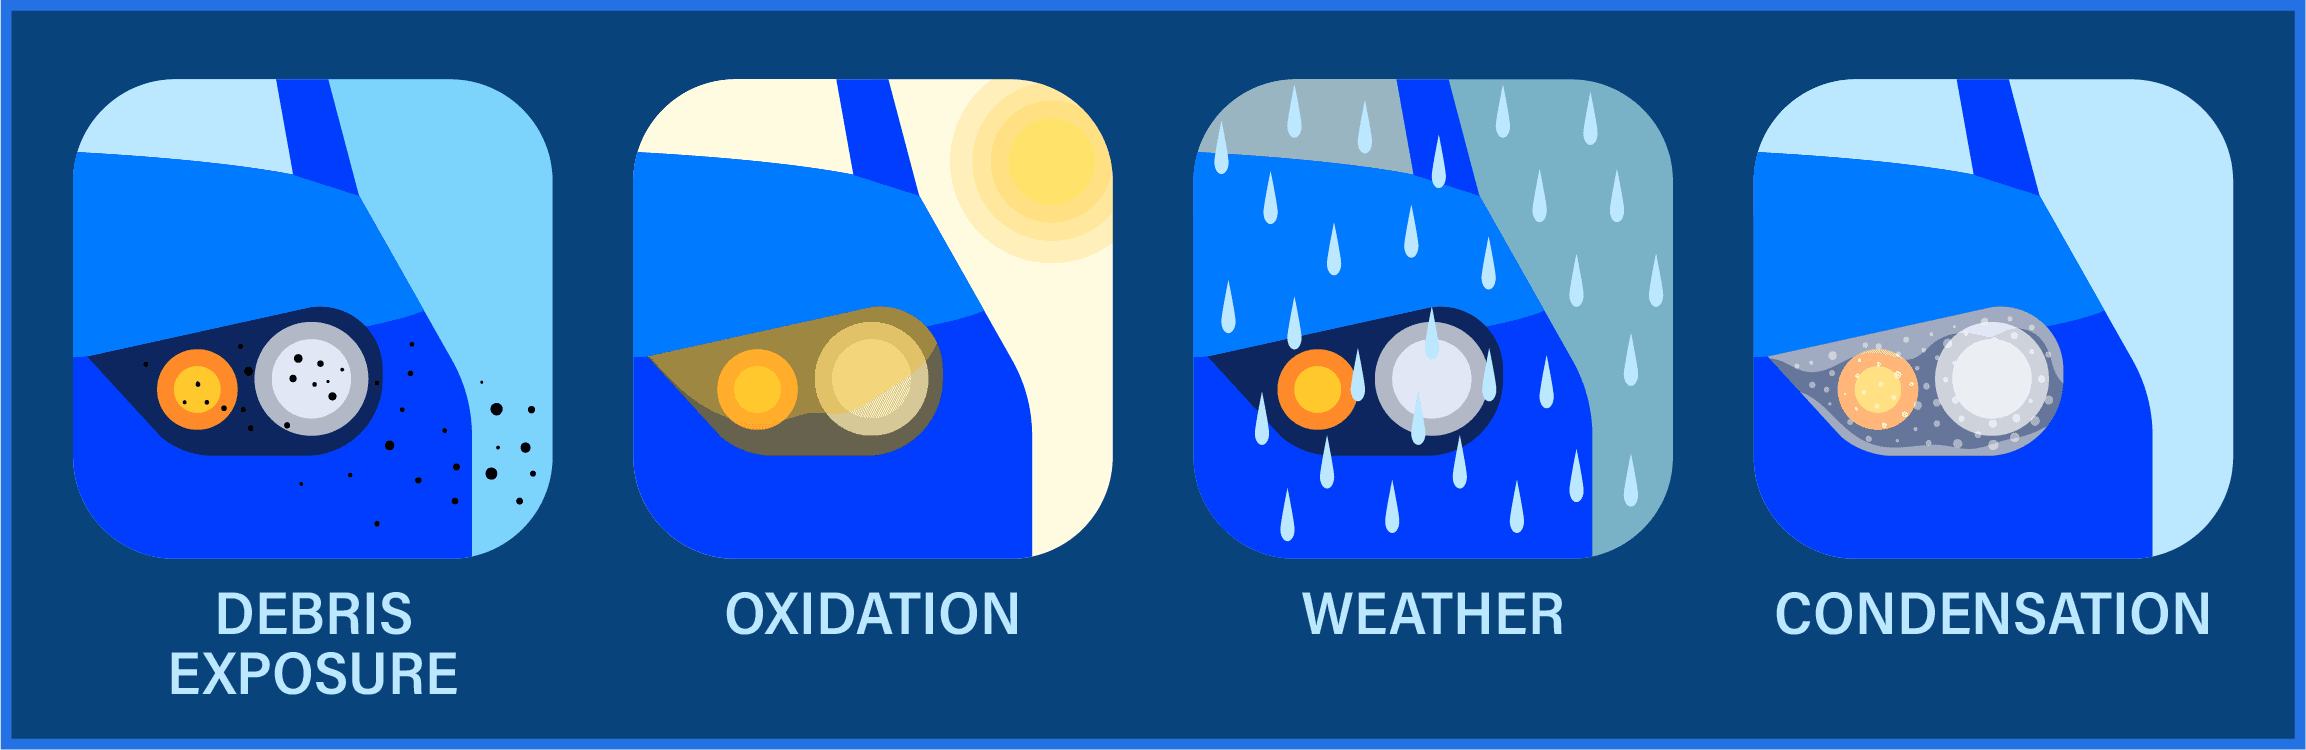
- Debris Exposure: The longer your vehicle spends on the road, the more it’s exposed to assorted debris such as tiny stones, sand, and dust. Over time, this debris can accumulate on your headlights, contributing to their foggy appearance.
- Oxidation: Unlike older models that featured glass headlights, modern cars use headlights made of polycarbonate plastic, which is susceptible to oxidation. As this plastic develops minute cracks, the sun’s UV rays cause them to yellow, reducing headlight clarity.
- Harsh Weather Conditions: Polycarbonate plastic headlights typically have a protective film to shield them from the elements. However, continual exposure to weather conditions like rain, snow, sleet, and hot temperatures can wear down this protective film, leading to headlight dullness.
- Condensation: High temperatures within the headlight assembly often lead to condensation — water vapor turning back into liquid droplets. This trapped moisture can dull the appearance of your headlights.
- Aging: Ultimately, time is the underlying factor. Regardless of how diligently you maintain your car’s headlights, aging and wear are inevitable, necessitating periodic cleaning and eventual headlight restoration.
Whatever the cause, the passage of time is always the underlying culprit. Unfortunately, no matter how well you take care of your car’s headlights, they will eventually need to be cleaned as the months and years progress.
Signs That Your Headlights Need Restoration
Recognizing the signs that your headlights need restoration can help you address the problem before it affects your visibility on the road. Here are some clear indicators that it may be time to consider restoring your headlights:
- Reduced light output: One of the first signs of foggy headlights is decreased light output. If you’re having trouble seeing the road at night or during poor weather conditions, it might be due to foggy headlights.
- Visible discoloration or cloudiness: When your headlights are new, they should be clear and free from any discoloration. Over time, they can become yellowish or foggy due to oxidation and exposure to UV rays. If you notice your headlights turning yellow or getting cloudy, it’s a clear sign they need restoration.
- Minor surface scratches and pits: Roads often kick up debris, leading to minor surface scratches and pits on your headlights. While small, these damages can accumulate over time and impact the clarity of your headlights.
How to Restore Your Headlights
Intrigued about restoring your auto headlights permanently? Follow this comprehensive, step-by-step guide to DIY headlight restoration, along with a few temporary fixes if you’re short on time.
Comprehensive Method for Headlight Restoration
The most effective way of restoring your car’s headlights involves using sandpaper. By removing the top layer of the headlight lens, you eradicate the damaged layer of plastic, thereby defogging the headlights.
Step 1: Gather your materials
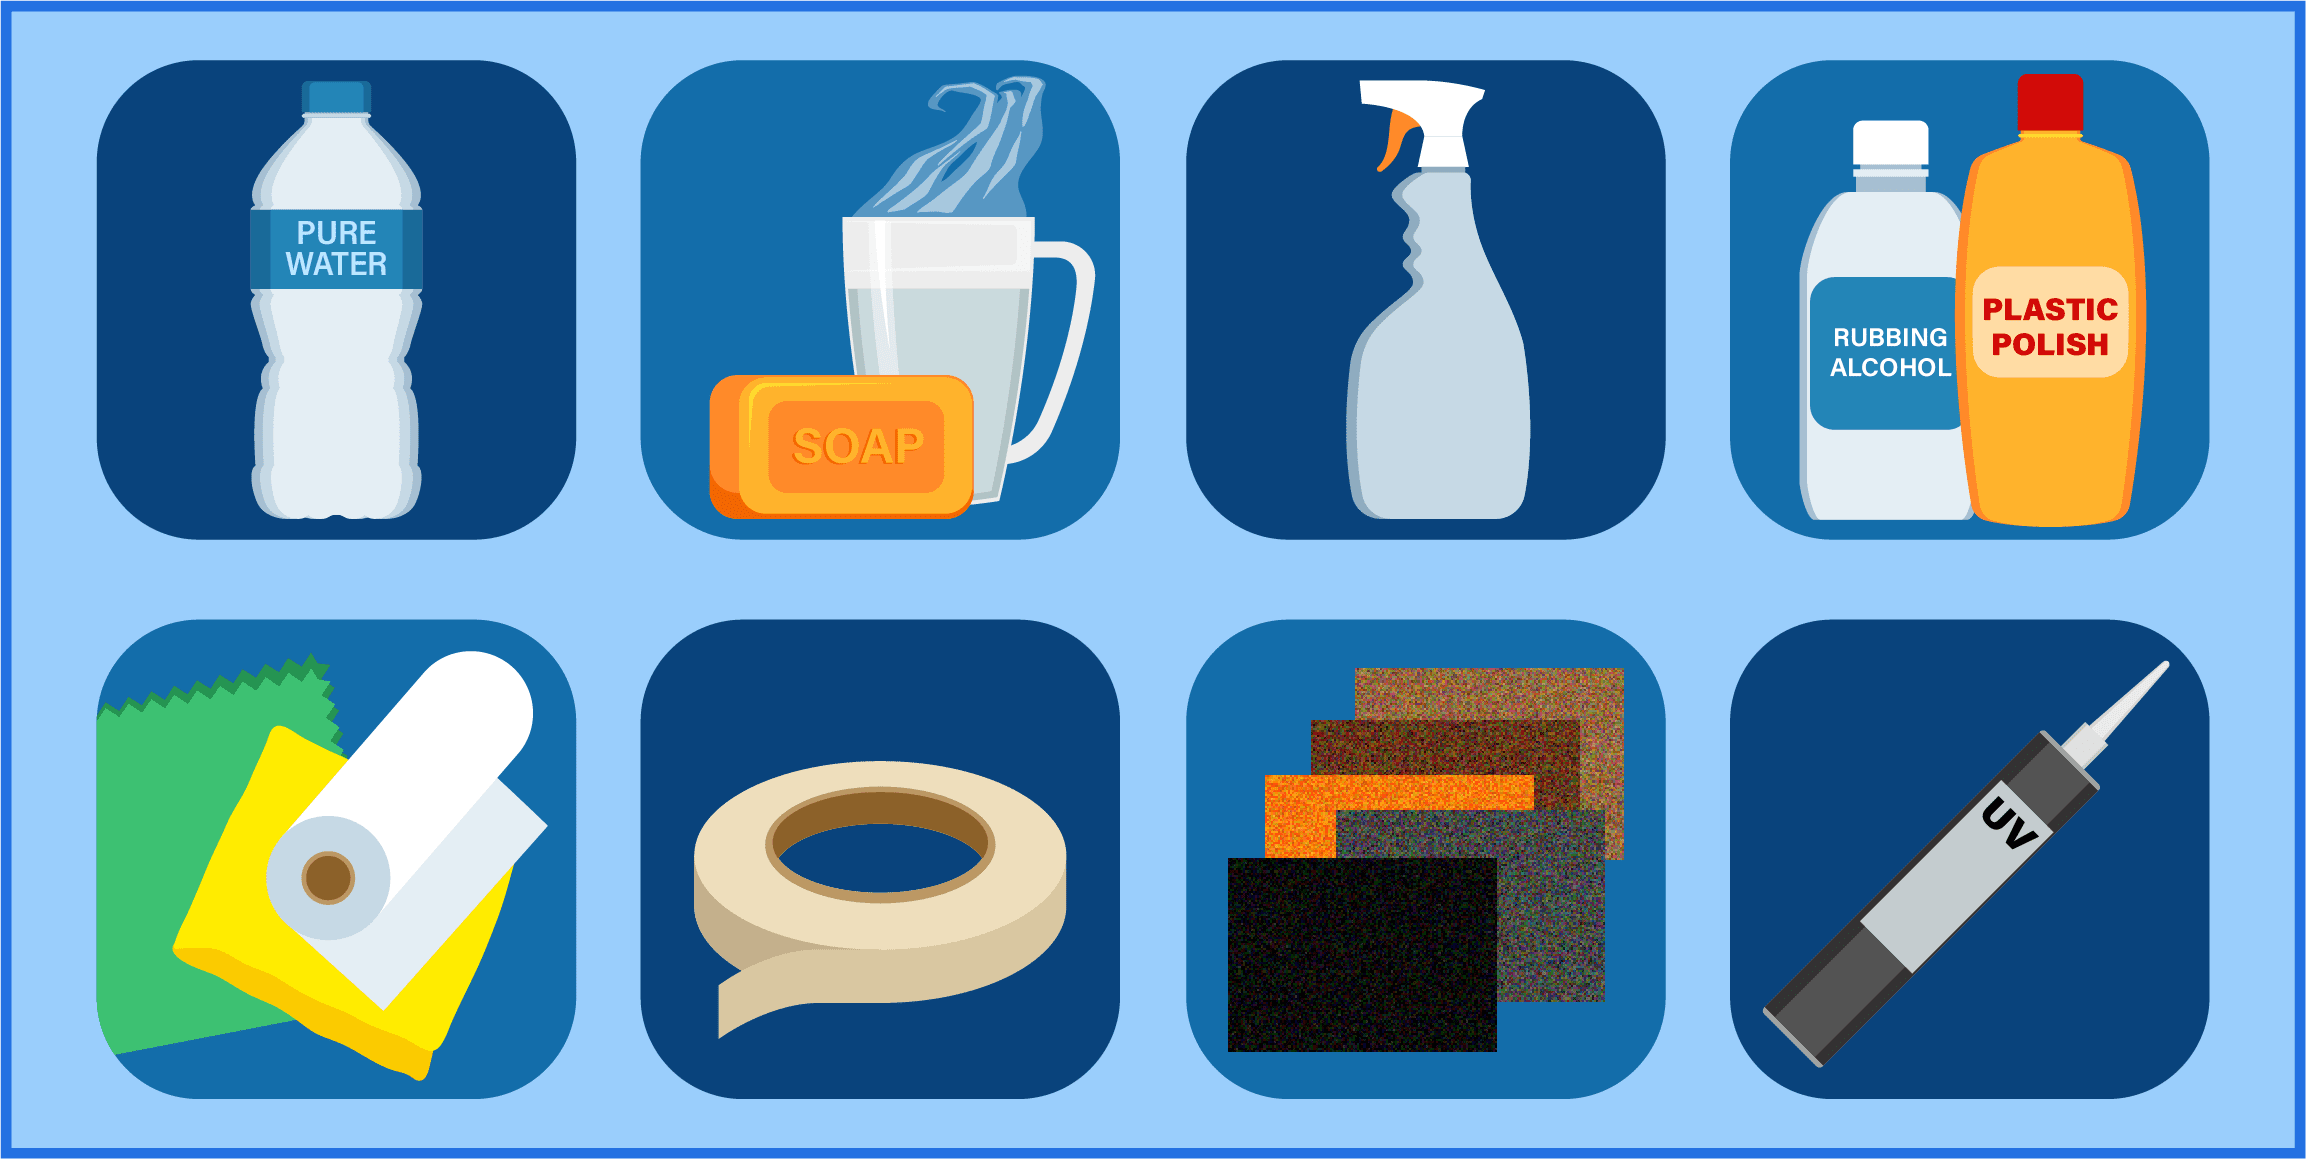
Before starting, make sure you have the following:
- Pure water
- Warm water with soap
- Spray bottle
- Rubbing alcohol
- A soft cloth (microfiber is ideal)
- Painter’s tape
- Sandpaper in multiple grits: 600, 1,000, and 2,000
- Paper towels
- Flannel cloth for polishing
- Plastic polishing compound
- UV sealant
Step 2: Clean the Headlights
Before sanding, clean your headlights thoroughly. If you don’t, you risk driving existing grime deeper into the headlights’ surface, making restoration impossible. Start by dipping the soft cloth into the warm, soapy water and wipe the headlights until they are as clean as possible. Clean the painted body of your car surrounding the headlights if necessary, and ensure everything is dry before proceeding.
Step 3: Protect Your Car’s Paint
As you’ll be applying sandpaper to your headlights, it’s important to shield the surrounding paintwork with painter’s tape to prevent potential damage.
Step 4: Start Sanding the Headlights
You are now ready to start the main step of headlight restoration: sanding. Here’s how:
- Dry Sand Using 600 Grit Sandpaper: Begin by sanding the entire surface of the headlight using the coarsest sandpaper. Ensure even coverage by moving the sandpaper horizontally across the headlights’ surface.
- Wet Sand Using 1,000 Grit Sandpaper: Spray plain water on your headlights and begin sanding with the next-finest sandpaper. Keep spraying water as needed to lubricate the area.
- Wet Sand Using 2,000 Grit Sandpaper: This finest grit of sandpaper is more about polishing than sanding. Continue using water to keep the surface wet and smooth it down.
Step 5: Clean and Polish
Remove the sanding debris using rubbing alcohol and paper towels, then apply a plastic polishing compound using the flannel polishing cloth. This step will make your headlights look and perform almost like new.
Step 6: Apply UV Sealant
Apply UV sealant to your headlights after sanding, cleaning, and polishing. Sun exposure is inevitable, but UV sealant can delay its effects. Experts recommend applying at least three coats of UV sealant for prolonged protection.
Quick DIY Headlight Restoration Fixes
If you’re short on time or your headlights are not significantly damaged, here are some quick fixes:
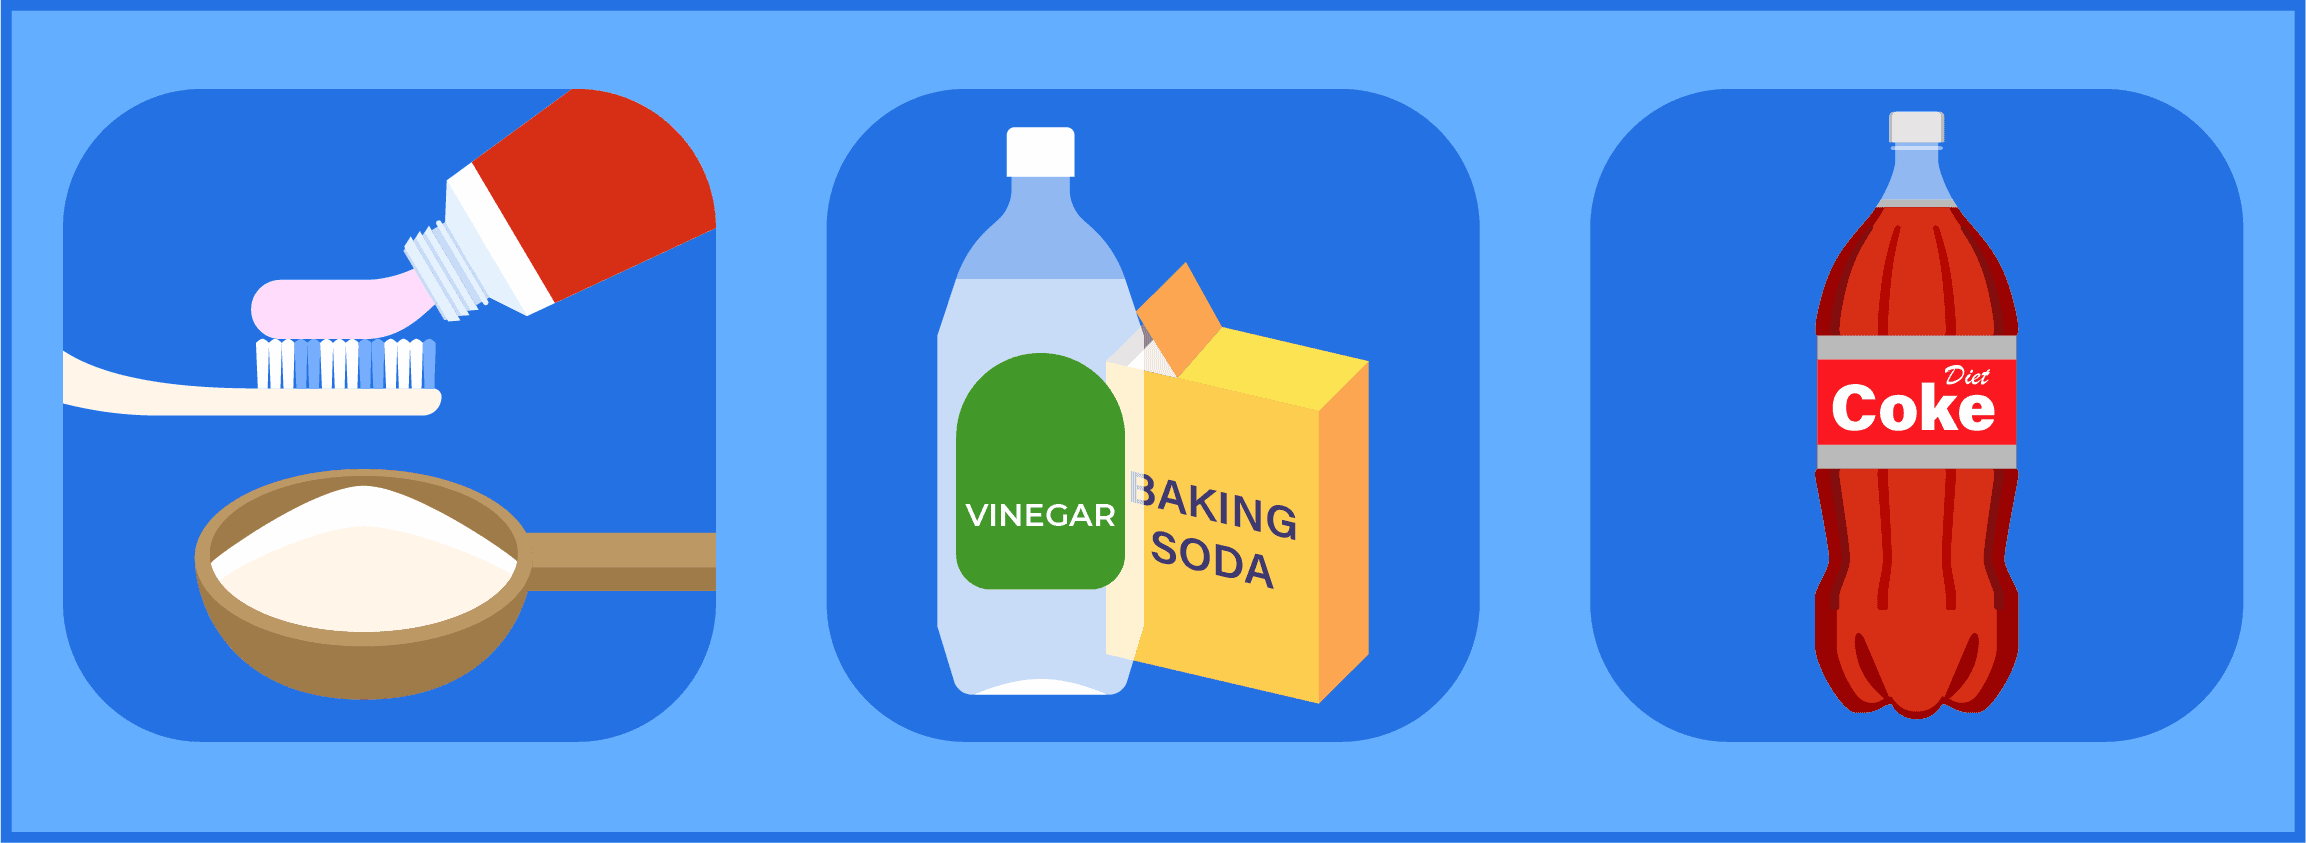
Toothpaste and baking soda
Apply a mixture of toothpaste and baking soda onto your headlights. Once dry, remove it with a damp cloth. This won’t be as effective as full restoration, but it will improve light output.
Vinegar and baking soda
Apply a mixture of equal parts vinegar and baking soda to your headlights. Let it sit for a few minutes, then wipe it away for a quick improvement.
Diet Coke
Diet Coke contains phosphoric acid, an excellent stain remover, and doesn’t have sugar that could complicate cleanup. Pour Diet Coke into a spray bottle, spray it onto your headlights, and dry it off with a soft cloth. Repeat if necessary.
How to Choose the Best Headlight Restoration Kit
When it comes to restoring your headlights, there are plenty of kits available in the market. Here are some of the best options you may consider:
1. 3M Headlight Restoration Kit
This kit is an excellent choice if you prefer to use a drill for the sanding steps of headlight restoration. (Note: You’ll need a drill to use this kit. If you don’t have one, consider the other kits on this list.) The 3M kit includes everything you need for a comprehensive five-step headlight restoration, including sanding discs, polishing pads and compound, a roll of tape to protect your car’s paint, and a lens protectant to apply at the end.
2. Sylvania Headlight Restoration Kit
The Sylvania kit doesn’t require a drill. All you need is some elbow grease. This kit involves three steps: 1) application of their proprietary surface activator that softens the plastic surface of the headlight lenses, 2) sanding and polishing the lenses, and 3) sealing with their UV block clear coat. The manufacturers note that this kit is sufficient for restoring two headlight assemblies.
3. Turtle Wax Headlight Restorer Kit
This is another user-friendly headlight restoration kit that doesn’t require the use of any additional tools. It’s an affordable yet reliable option. That’s probably why it’s a highly rated kit on the market, with over 8,000 reviews averaging 4.5 out of 5 stars.
Professional vs. DIY Headlight Restoration Cost

DIY headlight restoration is undoubtedly the more cost-effective choice. If you decide to go this route, you can expect to spend between $15 and $20 on a headlight restoration kit. This kit will usually be sufficient for up to three cars, bringing the cost per vehicle down to about $5 to $7.
On the other hand, professional headlight restoration services will typically cost between $100 and $250 per vehicle. This means that by choosing the DIY route, you could save anywhere from $85 to $230 per car.
When to Consider Professional Headlight Restoration Services
While the DIY route is certainly more cost-effective, there are situations where you might want to consider professional services. Here are a few:
- Time Constraints: Professional services can be a good option if you’re short on time. A professional can typically restore your headlights in an hour or two, while doing it yourself might take several hours, especially if you’re doing it for the first time.
- Severe Damage: If your headlights are severely damaged or oxidized, a professional might be able to do a more thorough job. They have access to professional-grade equipment and materials that might not be included in a consumer-grade restoration kit.
- Guaranteed Results: While DIY restoration kits can give good results, the outcome can depend on your skill and effort. A professional service, on the other hand, will guarantee a certain level of quality and usually provides a warranty on their work.
- Convenience: Ultimately, professional services offer convenience. You don’t have to worry about gathering materials or doing the work yourself. Instead, you can relax or take care of other tasks while someone else handles the job.
Tips to Maintain Clean and Clear Headlights
Even after restoring your headlights to their initial clarity, preventing further oxidation and degradation is crucial. Below are some valuable tips to help you keep your headlights clean and clear for longer:
- Regularly clean your car’s exterior: One of the primary contributors to foggy headlights is the build-up of dirt and debris on the lens surfaces. Regularly washing your car can significantly reduce this build-up, mitigating headlight damage and oxidation over time.
- Limit sun exposure: If possible, park your car in shady spots or, better yet, inside a garage. Minimizing exposure to UV radiation, which is a primary cause of headlight oxidation, will help maintain your headlights’ clarity and longevity.
- Schedule regular sanding sessions: Rather than waiting for your headlights to become so foggy they impair visibility and compromise safety, proactively maintain their clarity. Regularly sanding your headlights (every few months or so) can prevent substantial fogging and keep your headlights working optimally.
Remember, taking good care of your car’s headlights not only enhances its aesthetic appeal but also ensures safer driving, especially during nighttime or in poor weather conditions. Implement these preventative measures to delay the need for another full restoration process.